NEWS

News

Home

News

  • Camel Hump Support Grid: Load-Bearing Solution for Structured Packing Beds
    September 08, 2026

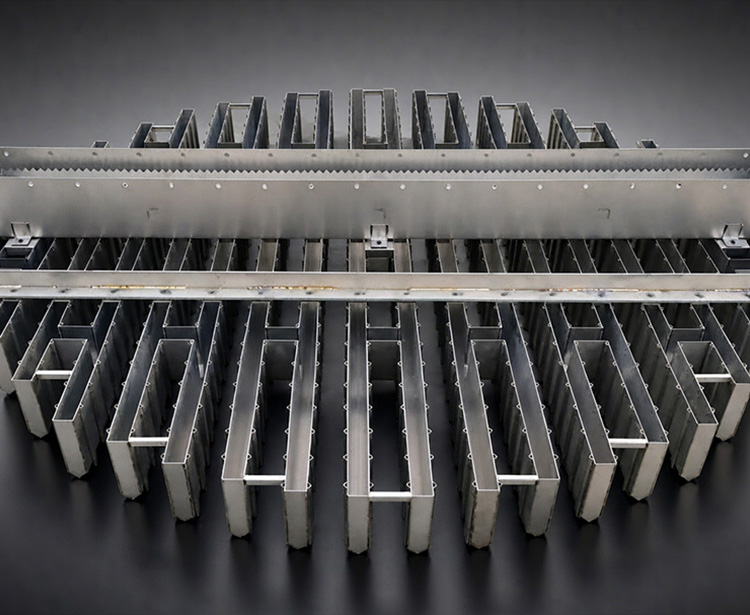
      { "@context": "https://schema.org", "@type": "Product", "name": "Camel Hump Support Grid - Packing Support for Structured & Random Beds", "description": "Camel hump (camelback) support grid with 90-95% free area and heavy load capacity. Engineered for structured and random packing beds in distillation, absorption, and scrubbing columns. SS304/316L, carbon steel, duplex available.", "brand": {"@type": "Brand", "name": "FXSINO"}, "sku": "FS-CHSG", "image": "/storage/uploads/images/202608/21/IMG_CAMEL_HUMP_HERO.jpg" } Figure 1: Camel hump support grid — continuous arched (wave) profile stamped from steel plate. Camel Hump Support Grid: Load-Bearing Solution for Structured Packing Beds Engineering Alert: The support grid is the foundation of your packed bed. A failed support means collapsed packing, blocked gas flow, and a costly shutdown. Camel hump (camelback) grids deliver 90%+ open area with exceptional load-bearing capacity — but only when designed to your specific column loads. Here's the data you need. 1. What Is a Camel Hump Support Grid? A camel hump support grid — also called a camelback support — is fabricated from steel plates stamped into continuous arched (wave) profiles. The "humps" create a rigid structural section, while the spaces between arches provide high open area for gas and liquid passage. Unlike flat bar grids, the arched geometry turns each rib into a load-carrying beam . Each arch acts like a small bridge: the curved profile converts vertical bed load into compressive force along the arc, distributing stress evenly to the tower wall instead of concentrating it at the center . This is why a camel hump grid can carry substantially more load than a flat grid of the same plate thickness. Figure 2: Key dimensions — arch height (H), plate thickness (t), and open area ratio. 2. Design Parameters Parameter Typical Range Design Note Open Area 90 – 95% Minimizes pressure drop across the support plane . Arch Height 150 – 300 mm Higher arches carry more load but reduce available bed height . Plate Thickness 3 – 6 mm Driven by calculated bed load (see Section 3) . Module Width 300 – 500 mm Must pass through the column manway (typically DN500 or larger) . Hole Diameter 10 – 25 mm Balance liquid drainage vs. packing fallback. Applicable Tower Dia. DN300 – DN6000 Modular assembly covers small to very large columns . 3. Load-Bearing Capacity Data The load-bearing capacity depends on three variables: plate thickness, arch height, and material grade. The total bed load includes packing weight, liquid holdup, and any process-side pressure differential . Typical Load Capacity by Plate Thickness (SS316L, Arch Height 200 mm): • 3 mm plate: ~2,500 kg/m² (light-duty; suitable for 250Y beds < 3 m tall) • 4 mm plate: ~4,500 kg/m² (standard-duty; most 500Y applications) • 6 mm plate: ~8,000 kg/m² (heavy-duty; tall beds, high liquid holdup, vacuum service) Design Safety Factor: Always specify a minimum 2.5× safety factor over the calculated operating load. Temperature above 300°C requires derating — consult our engineers. Figure 3: Camel hump grid (left) delivers 90%+ open area vs. ~45% for a traditional bar grid (right). 4. Camel Hump vs. Bar Grid: Which to Choose? Factor Camel Hump Grid Bar Grid Open Area 90 – 95% 40 – 50% Pressure Drop Minimal (0.1–0.3 kPa typical) Moderate to high Liquid Redistribution Built-in (arch valleys collect & re-drip) None (requires separate collector) Load Capacity High (arch acts as beam) Moderate Fouling Risk Low (self-draining valleys) Higher (flat surfaces trap solids) 5. 4-Step Selection Method Step 1 — Calculate Bed Load: Packing bulk density × bed height × tower area + liquid holdup (typically 5-15% of packing volume). For 500Y packing, expect ~7.2 kg/m² per mm of bed height. Step 2 — Verify Manway Access: Module width must be ≤ manway ID minus 50 mm clearance. Standard DN500 manway → max module width 450 mm. Step 3 — Check Process Conditions: Temperature > 300°C requires thicker plate or upgraded alloy. Vacuum service needs smooth gas entry (hump profile minimizes entry loss). Step 4 — Match Corrosion Rating: Same alloy as your packing. See our 304 vs 316L guide for chloride thresholds. Figure 4: Installing camel hump grid modules through a DN500 manway. 6. Material Selection Corrosion & Temperature Limits SS304L: Clean organics, atmospheric temperature. Most economical choice. SS316L: Amine service, H2S, CO2, trace chlorides. The industry default for refinery service . Duplex 1.4462: Chlorides > 500 ppm, higher mechanical strength at temperature . Titanium Grade 2: Aggressive chlorides, wet Cl2, seawater stripping. 7. Installation & Common Failure Modes Failure Mode Cause Prevention Permanent Deformation Overload or high-temperature creep Apply 2.5× safety factor; derate for T > 300°C Packing Fall-Through Hole diameter too large for packing size Max hole = 60% of packing corrugation spacing Gas Bypassing Gaps between modules and shell Weld perimeter seal strips during installation Corrosion Perforation Concentrated corrosives in valleys Specify same alloy as packing; ensure drainage 8. Pairing with Liquid Distributors The camel hump grid sits at the bottom of the packed bed. Above it sits the packing, and above that sits the liquid distributor. The grid's arch valleys naturally collect liquid and act as a crude redistributor — especially valuable when paired with perforated plate structured packing, which adds lateral redistribution through perforations. For a complete overview of packing selection, see our 5-factor guide. Figure 5: Full tower internals assembly — camel hump grid at bottom, structured packing in middle, liquid distributor on top. Quick FAQ Q: Can a camel hump grid replace a separate liquid collector? A: In many cases, yes. The arch valleys collect liquid and drip it onto the bed below, providing basic redistribution. However, for tall columns (> 6 m bed height) or severe maldistribution, a dedicated liquid collector and redistributor is still recommended at intermediate levels. Q: How do I prevent packing from falling through the grid holes? A: The maximum hole diameter should not exceed 60% of the packing's corrugation spacing. For 250Y (spacing ~25 mm), holes should be ≤ 15 mm. For 500Y (spacing ~12 mm), holes should be ≤ 7 mm. We can supply mesh overlay if needed. Q: What's the maximum temperature for SS316L camel hump grids? A: SS316L retains full strength up to ~425°C. Above that, creep becomes significant — we recommend Duplex or Inconel 625 for continuous service above 450°C. Need Engineering Drawings & Load Calculations? FXSINO supplies camel hump support grids with full mechanical calculations, material mill certificates (MTC to ASTM A240), and matched tower internals. Send us your tower ID, bed height, and process conditions — we'll engineer the right solution. Contact FXSINO: jackieqiu9202@gmail.com | +86 18507999558

    Read More

  • Metal Structured Packing Manufacturer | 500Y/700Y Metal Packing
    September 04, 2026

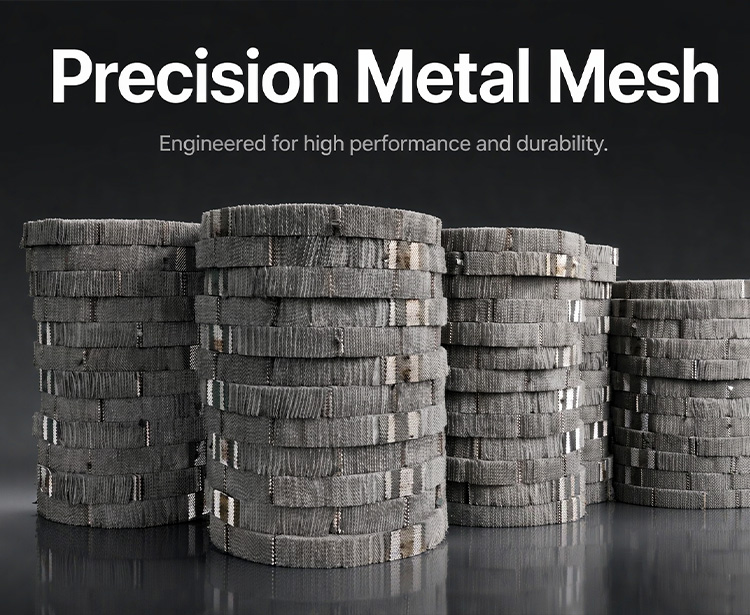
      { "@context": "https://schema.org", "@type": "Product", "name": "Metal Structured Packing 500Y/700Y - Wire Gauze & Perforated Plate", "description": "Metal structured packing in 500Y and 700Y models for vacuum distillation, precision rectification, and separation of thermally sensitive materials. SS304/304L/316/316L, high specific surface area up to 700 m²/m³, low pressure drop, manufactured to customer tower drawings.", "brand": {"@type": "Brand", "name": "FXSINO"}, "sku": "FS-MSP-500-700", "image": "/storage/uploads/images/202608/21/IMG_MSP_HERO.jpg" } Figure 1: 500Y/700Y metal wire gauze structured packing — disc segments ready for column installation. Metal Structured Packing Manufacturer | 500Y/700Y Metal Packing Manufacturer Brief: FXSINO is a metal structured packing manufacturer supplying 500Y and 700Y models in SS304, 304L, 316, and 316L. These high-specific-surface-area packings are engineered for vacuum distillation, thermal-sensitive separation, and precision rectification where low pressure drop and high theoretical plate count are critical . 1. What Is Metal Structured Packing? Metal structured packing is a high-efficiency mass transfer device fabricated from thin metal sheets (typically 0.1–0.2 mm thick) of stainless steel, carbon steel, aluminum, or titanium. Each sheet is precision-stamped and corrugated to form channels at a fixed angle to the column axis. Adjacent sheets are arranged with opposite corrugation directions, creating a geometrically ordered network of micro-channels that eliminate channeling and wall-flow . The 500Y and 700Y models belong to the family of high-specific-surface-area packings. The "Y" denotes a 45° corrugation angle ; the number indicates nominal specific surface area in m²/m³ . Compared to random packings, structured packing delivers 4.5× the specific surface area of Pall rings with dramatically lower pressure drop . Figure 2: 45° corrugated sheets arranged with opposite orientations create uniform micro-channels. 2. 500Y vs 700Y: Technical Specifications Both 500Y and 700Y are available as either wire gauze (for maximum wettability and vacuum service) or perforated plate (for higher mechanical strength and fouling resistance). Key parameters : Model CorrugationAngle Specific Area(m²/m³) Void Fraction(%) Theoretical Plates(per m) Pressure Drop(MPa/m) HETP(mm) 250Y(reference) 45° 250 97–98 2.5–3.0 2–3 × 10⁻⁴ 300–450 500Y 45° 500 90–95 4.5–5.5 3 × 10⁻⁴ 200–300 700Y 45° 700 85–87 8–10 4.5–6.5 × 10⁻⁴ 150–200 Data compiled from multiple manufacturers' standard datasheets . 500Y is the single most widely used model of wire gauze structured packing ; 700Y doubles the theoretical plate count per meter for ultra-precision separation. Custom models 450Y, 550Y(X), and 750Y are available on request. 3. Why Choose 500Y / 700Y? Core Performance Advantages Ultra-High Separation Efficiency: 700Y delivers 8–10 theoretical plates per meter — ideal for isotope separation and high-purity fine chemicals . Low Pressure Drop: 500Y operates at just 0.05–0.3 kPa/m, enabling deep vacuum distillation below 7 kPa without excessive energy loss . Capillary Wettability: Wire gauze construction traps liquid into a thin film, maintaining high efficiency even at spray densities as low as 0.2 m³/(m²·h) . No Amplification Effect: Regular geometric arrangement means lab performance scales predictably to large-diameter towers . Large Operational Flexibility: Performs consistently across wide load fluctuations with almost no low-load limit . 4. Material Selection Material Service Condition Typical Application SS304 / 304L General service, non-chloride Methanol rectification, ethanol recovery SS316 / 316L Chloride-containing, mild acid Acetic acid rectification, HCl recovery, amine service 321 Stainless High-temperature oxidation resistance Reformer units, high-temp vacuum columns Duplex 2205 / Titanium Strong corrosion + high purity PTA, pharmaceutical intermediates Carbon Steel Non-corrosive hydrocarbon Cost-sensitive atmospheric distillation All materials are available with mill test certificates (MTC) to ASTM A240. For a detailed comparison of 304 vs 316L, see our 304 vs 316L material guide. 5. Primary Applications • Vacuum Distillation: Thermally sensitive materials, deep vacuum service below 7 kPa — essential for fragrances, vitamins, and fine chemicals . • Precision Rectification: High-purity solvent recovery (≥ 99.9%), isomer separation, isotopic compound separation . • Petrochemical: Ethylene demethanizer (cryogenic separation), styrene monomer purification, refinery vacuum towers . • Coal Chemical: Methanol rectification (3-column / 4-column process), glycol separation . • Pharmaceutical: Vitamin E refinement, vitamin C extraction, API purification . • Air Separation: Liquid nitrogen wash, cooling tower, rare gas recovery . Figure 3: Adjacent packing layers rotated 90° during installation to ensure uniform gas-liquid distribution. 6. Installation Guidelines Layer Orientation: Adjacent packing beds must be rotated 90° relative to each other to promote radial mixing and prevent channeling . Pour Height: Always pour packing from a height above the bed — never drop directly. Personnel must not stand on the packing; lay boards to distribute weight . Bed Limiters: Install hold-down plates above each bed to prevent fluidization under high gas velocity. See our Bed Limiter guide. Redistribution: For beds taller than 3–5 m, install liquid collectors and redistributors. See our Collector & Redistributor guide. Not Recommended For: Heavy fouling services and strongly corrosive media — consider perforated plate type instead of wire gauze . 7. Quick FAQ Q: When should I specify 700Y instead of 500Y? A: Choose 700Y when your separation requires 8–10 theoretical plates per meter — typically isotope separation, isomer separation, or ultra-high-purity fine chemicals. For general vacuum distillation of thermally sensitive materials, 500Y offers the best balance of efficiency and capacity . Q: What is the minimum column diameter for 500Y/700Y? A: Wire gauze structured packing performs best in small-to-medium diameter columns (typically DN100–DN1200). For larger diameters, perforated plate type (250Y/350Y) is recommended to manage manufacturing and installation costs. We engineer each packing disc to your tower's exact inner diameter . Q: Can you manufacture to our tower drawings? A: Yes. As a structured packing manufacturer, we fabricate every disc to your column's inner diameter, bed height, and material specification. Send us your tower drawing and process conditions, and we will deliver ready-to-install packing discs with full dimensional inspection reports . Request 500Y/700Y Metal Structured Packing FXSINO manufactures 500Y and 700Y metal structured packing in wire gauze and perforated plate configurations, with SS304, 304L, 316, 316L, 321, duplex, and titanium materials. Production capacity up to 1,000 m³/month. Every order ships with material mill certificates and dimensional inspection reports. Contact FXSINO: jackieqiu9202@gmail.com | +86 18507999558

    Read More

  • Stainless Steel Metal Pall Ring: Random Packing for Distillation & Scrubbing
    September 04, 2026

      { "@context": "https://schema.org", "@type": "Product", "name": "Stainless Steel Metal Pall Ring - Random Packing for Distillation & Scrubbing", "description": "Stainless steel metal Pall Rings in 16mm, 25mm, 38mm, 50mm, and 76mm for distillation, absorption, and gas scrubbing. High void fraction above 95%, low pressure drop, SS304/304L/316/316L available.", "brand": {"@type": "Brand", "name": "FXSINO"}, "sku": "FS-SS-PR", "image": "/storage/uploads/images/202608/21/IMG_SS_PALL_HERO.jpg" } Figure 1: Stainless steel Pall Ring — cylindrical body with stamped windows and inward-bent fingers. Stainless Steel Metal Pall Ring: Random Packing for Distillation & Scrubbing Engineering Alert: When your column runs above 100°C, operates under vacuum, or handles hydrocarbons and high-pressure gas, plastic packings will deform or fail. Stainless steel metal Pall Rings deliver void fractions above 95%, low pressure drop, and the mechanical strength to support deep beds — the industry standard for distillation and scrubbing service. 1. What Is a Stainless Steel Pall Ring? The Pall Ring is the evolved form of the classic Raschig ring. While it retains the cylindrical shape (height equals diameter), its wall is punched with two rows of windows, and the resulting metal tabs are bent inward toward the center . This simple change transforms performance: the windows create internal surfaces and open pathways that drastically improve liquid distribution, mass transfer efficiency, and throughput while lowering pressure drop . Stamping the rings from stainless steel strip (rather than casting) gives them high dimensional precision, thin walls, and consistent mechanical strength — all critical for large-scale industrial columns. Figure 2: Punched windows and inward-bent fingers create internal wetting surfaces. 2. Technical Specifications (SS304 Reference) The table below lists the standard sizes based on SS304 and a wall thickness of 0.3–1.2 mm. Bulk density varies with both material grade and wall thickness; the values shown are for reference . Size D×H×T (mm) Surface Area (m²/m³) Void Fraction (%) Bulk Number (pcs/m³) Bulk Density (kg/m³) 16 × 16 × 0.3 362 94.9 214,000 396 25 × 25 × 0.5 219 95.0 51,940 393 38 × 38 × 0.6 146 95.9 15,180 318 50 × 50 × 0.8 109 96.0 6,500 314 76 × 76 × 1.2 71 96.1 1,830 308 Data source: compiled from industry standard datasheets (SS304, theoretical values for reference; actual bulk density varies with wall thickness) . Custom sizes (6/10/13/89/100 mm) and non-standard thicknesses are available on request. 3. Why Metal Pall Ring Outperform in Harsh Service Key Performance Advantages High Loading & Throughput, Low Pressure Drop: Void fractions above 95% minimize resistance to gas flow, allowing higher capacity before flooding . Superior Mass Transfer: The windows and fingers spread liquid evenly and resist nesting, channeling, plugging, and fouling . Excellent Wettability: Metal surfaces wet more readily than plastics, maintaining efficiency even at low liquid loads . Mechanical Strength for Deep Beds: Stainless steel's robustness means negligible breakage — suitable for deeper packed beds under high pressure . High-Temperature & High-Pressure Capable: Unlike plastics, metal rings withstand thermal cycling and elevated temperatures without deformation (stainless grades suitable up to 400–500°C depending on alloy) . Figure 3: Material selection — metal for high temperature & pressure, plastic for corrosion, ceramic for extreme heat. 4. Material Selection: Which Stainless Grade? Material Service Temperature Typical Application SS304 / 304L Up to ~400°C Clean organics, hydrocarbon fractionation, general service SS316 / 316L Up to ~400°C Acid gas absorption, amine/CO2 service, chloride-containing streams Carbon Steel Up to ~350°C Cost-sensitive, non-corrosive hydrocarbon service Duplex 2205 / 904L Up to ~300°C High chloride / seawater, aggressive corrosion Hastelloy / Titanium / Monel Alloy-dependent Severe corrosion, halides, hot acids For a deeper dive into the 304 vs 316L decision, see our 304 vs 316L material guide. Available grades include SS304, 304L, 316, 316L, 410, 2205 duplex, 904L, plus carbon steel and exotic alloys . 5. Primary Applications Metal Pall Rings are specified across separation, absorption, and desorption services — at both atmospheric pressure and under vacuum, where minimizing pressure drop is critical . • Distillation Columns: Crude oil fractionation, ethylbenzene/styrene separation, ethanol rectification, vacuum distillation . • Absorption & Scrubbing: H2S, NH3, SO2, CO2 removal; acid gas scrubbers; quenching towers . • Stripping: Steam stripping, VOC recovery, direct-contact cooling . • Petrochemical & Refining: Catalytic reforming, gas processing, decarbonization, desulfurization . • Heat Recovery & Extraction: Counter-current heat exchange and solvent extraction . Figure 4: Stainless steel Pall Rings being loaded into a distillation column. 6. Quick FAQ Q: When should I choose metal over plastic Pall Rings? A: Choose metal when operating temperature exceeds 100°C, under vacuum, at high pressure, or with hydrocarbon/organic streams where plastics deform or swell. For corrosive services below 100°C, plastics like PP or PTFE are more economical. Q: How much packing do I need for my column? A: Use the bulk number from the table. For a 1.5 m ID column with 4 m bed height of 38mm rings: π × 0.75² × 4 × 15,180 ≈ 107,200 pieces. Contact us with your tower ID and bed height for a precise quote. Q: Can stainless steel Pall Rings be used with structured packing? A: Yes. Random metal Pall Rings are often used in the lower or upper beds alongside structured packing, especially in revamps or where redistribution is needed. We can engineer a hybrid bed design for your column. Need Stainless Steel Pall Rings? FXSINO supplies stainless steel metal Pall Rings in SS304, 304L, 316, and 316L in all standard sizes (16/25/38/50/76 mm), with optional carbon steel, duplex, Hastelloy, or titanium. Every batch ships with material mill certificates (MTC to ASTM A240) and dimensional inspection reports. Contact FXSINO: jackieqiu9202@gmail.com | +86 18507999558

    Read More
  • Camel Hump Support Grid: Design & Load Data
    August 21, 2026

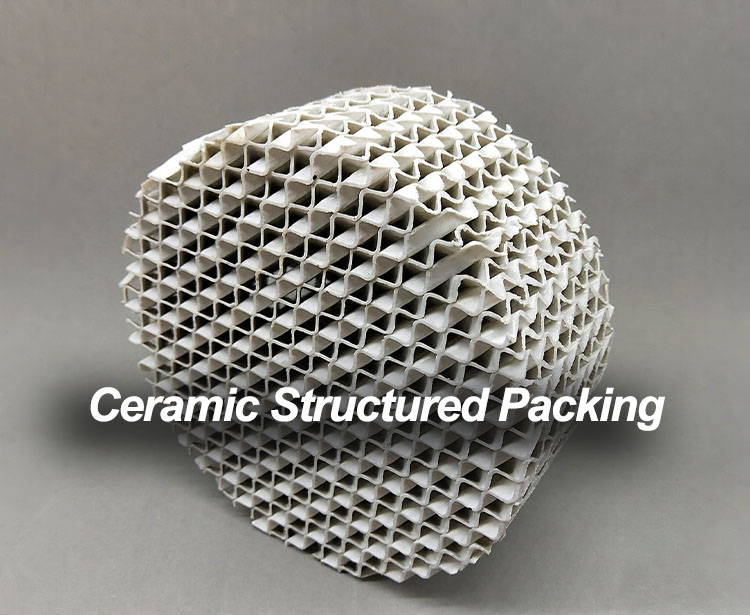
      { "@context": "https://schema.org", "@type": "Article", "headline": "Camel Hump Support Grid: Design & Load Data", "description": "Technical guide to camel hump support grids for structured packing beds. Covering design parameters, load-bearing capacity, material selection, and installation best practices.", "author": {"@type": "Person", "name": "Jackie Qiu"}, "publisher": {"@type": "Organization", "name": "FXSINO"} } Figure 1: Camel hump support grid — continuous arched profile stamped from steel plate. Camel Hump Support Grid: Design & Load Data Engineering Alert: The support grid is the foundation of your packed bed. A failed support means collapsed packing, blocked gas flow, and a costly shutdown. Camel hump (camelback) grids deliver 90%+ open area with exceptional load-bearing capacity—but only when designed to your specific column loads. Here's the data you need. 1. What Is a Camel Hump Support Grid? A camel hump support grid—also called a camelback support—is fabricated from steel plates stamped into continuous arched (wave) profiles. The "humps" create a rigid structural section, while the spaces between arches provide high open area for gas and liquid passage. Unlike flat bar grids, the arched geometry turns each rib into a load-carrying beam. Figure 2: Key dimensions—arch height (H), plate thickness (t), and open area ratio. 2. Design Parameters Parameter Typical Range Design Note Open Area 90 - 95% Minimizes pressure drop across the support plane. Arch Height 150 - 300 mm Higher arches carry more load but reduce bed height. Plate Thickness 3 - 6 mm Driven by calculated bed load (see Section 3). Module Width 300 - 500 mm Must pass through the column manway (typically DN500 or larger). Hole Diameter 10 - 25 mm Balance liquid drainage vs. packing fallback. 3. Load-Bearing Capacity Data The load-bearing capacity of a camel hump grid depends on three variables: plate thickness, arch height, and material grade. The total bed load includes packing weight, liquid holdup, and any process-side pressure differential. Typical Load Capacity by Plate Thickness (SS316L, Arch Height 200 mm): • 3 mm plate: ~2,500 kg/m² (light-duty; suitable for 250Y beds < 3 m tall) • 4 mm plate: ~4,500 kg/m² (standard-duty; most 500Y applications) • 6 mm plate: ~8,000 kg/m² (heavy-duty; tall beds, high liquid holdup, vacuum service) Design Safety Factor: Always specify a minimum 2.5× safety factor over the calculated operating load. Temperature above 300°C requires derating—consult our engineers. Figure 3: Camel hump grid (left) delivers 90%+ open area vs. ~45% for a traditional bar grid (right). 4. Camel Hump vs. Bar Grid: Which to Choose? Factor Camel Hump Grid Bar Grid Open Area 90 - 95% 40 - 50% Pressure Drop Minimal Moderate to high Liquid Redistribution Built-in (arch valleys collect & re-drip) None (requires separate collector) Load Capacity High (arch acts as beam) Moderate Fouling Risk Low (self-draining valleys) Higher (flat surfaces trap solids) 5. 4-Step Selection Method Step 1 — Calculate Bed Load: Packing bulk density × bed height × tower area + liquid holdup (typically 5-15% of packing volume). For 500Y packing, expect ~7.2 kg/m² per mm of bed height. Step 2 — Verify Manway Access: Module width must be ≤ manway ID minus 50 mm clearance. Standard DN500 manway → max module width 450 mm. Step 3 — Check Process Conditions: Temperature > 300°C requires thicker plate or upgraded alloy. Vacuum service needs smooth gas entry (hump profile minimizes entry loss). Step 4 — Match Corrosion Rating: Same alloy as your packing. See our 304 vs 316L guide for chloride thresholds. Figure 4: Installing camel hump grid modules through a DN500 manway. 6. Material Selection Corrosion & Temperature Limits SS304L: Clean organics, atmospheric temperature. Most economical choice. SS316L: Amine service, H2S, CO2, trace chlorides. The industry default for refinery service. Duplex 1.4462: Chlorides > 500 ppm, higher mechanical strength at temperature. Titanium Grade 2: Aggressive chlorides, wet Cl2, seawater stripping. 7. Installation & Common Failure Modes Failure Mode Cause Prevention Permanent Deformation Overload or high-temperature creep Apply 2.5× safety factor; derate for T > 300°C Packing Fall-Through Hole diameter too large for packing size Max hole = 60% of packing corrugation spacing Gas Bypassing Gaps between modules and shell Weld perimeter seal strips during installation Corrosion Perforation Concentrated corrosives in valleys Specify same alloy as packing; ensure drainage 8. Pairing with Liquid Distributors The camel hump grid sits at the bottom of the packed bed. Above it sits the packing, and above that sits the liquid distributor. The grid's arch valleys naturally collect liquid and act as a crude redistributor—especially valuable when paired with perforated plate structured packing, which adds lateral redistribution through perforations. For a complete overview of packing selection, see our 5-factor guide. Figure 5: Full tower internals assembly—camel hump grid at bottom, structured packing in middle, liquid distributor on top. Quick FAQ Q: Can a camel hump grid replace a separate liquid collector? A: In many cases, yes. The arch valleys collect liquid and drip it onto the bed below, providing basic redistribution. However, for tall columns (> 6 m bed height) or severe maldistribution, a dedicated liquid collector and redistributor is still recommended at intermediate levels. Q: How do I prevent packing from falling through the grid holes? A: The maximum hole diameter should not exceed 60% of the packing's corrugation spacing. For 250Y (spacing ~25 mm), holes should be ≤ 15 mm. For 500Y (spacing ~12 mm), holes should be ≤ 7 mm. We can supply mesh overlay if needed. Q: What's the maximum temperature for SS316L camel hump grids? A: SS316L retains full strength up to ~425°C. Above that, creep becomes significant—we recommend Duplex or Inconel 625 for continuous service above 450°C. Need Engineering Drawings & Load Calculations? FXSINO supplies camel hump support grids with full mechanical calculations, material mill certificates, and matched tower internals. Send us your tower ID, bed height, and process conditions—we'll engineer the right solution. Contact FXSINO: jackieqiu9202@gmail.com | +86 18507999558

    Read More
  • Liquid Distributor for Packed Columns: Types, Selection & Distribution Accuracy
    August 21, 2026

      { "@context": "https://schema.org", "@type": "Article", "headline": "Liquid Distributor for Packed Columns: Types, Selection & Distribution Accuracy", "description": "Compare pan, pipe arm, and spray liquid distributors for packed columns. Learn the 5-step selection method and why distribution accuracy makes or breaks your packing efficiency.", "author": {"@type": "Person", "name": "Jackie Qiu"}, "publisher": {"@type": "Organization", "name": "FXSINO"} } Figure 1: Pan distributor (left), pipe arm distributor (center), and spray nozzle distributor (right). Liquid Distributor for Packed Columns: Types, Selection & Distribution Accuracy Design Alert: Choosing the right liquid distributor for your packed column isn't just about uniform irrigation—it's about protecting your packing investment. Industry data shows over 70% of packed column failures trace back to maldistribution, not the packing itself. Get the distributor right, and your column will deliver its rated efficiency from day one. 1. Why Distribution Accuracy Makes or Breaks Your Column The relationship between distributor quality and packing performance is exponential. A well-designed distributor with 95% uniformity lets your packing achieve its published HETP (Height Equivalent to a Theoretical Plate). A poor distributor at 60% uniformity can double your HETP, effectively wasting half your tower height. Figure 2: Liquid distributor positioned above the structured packing bed inside a distillation column. The HETP Impact Formula:HETPactual = HETPpacking ÷ Distribution_Efficiency Example: A 500Y packing rated at 0.35 m HETP will perform at 0.70 m if your distributor only delivers 50% uniformity. You paid for 500Y performance but got 250Y results. 2. Three Main Types of Liquid Distributors 2.1 Gravity Pan Distributor (Trough / Deck Type) The gold standard for large-diameter columns. Liquid enters a central feed pipe, flows into a primary trough, then overflows into secondary troughs with V-notches or holes that drip onto the packing below. Best for: Tower diameters > 1.5 m, high liquid loads (> 50 m³/m²·h). Accuracy: ★★★★★ (up to 98% uniformity when properly leveled). Drawback: Complex fabrication, requires precise installation leveling. 2.2 Pipe Arm (Spider) Distributor A central header with radiating arms, each drilled with precisely sized orifices. Liquid is forced through the holes by gravity head or slight pressure. Best for: Medium tower diameters (0.5 - 3 m), vacuum service, moderate liquid loads. Accuracy: ★★★★☆ (90-95% uniformity). Drawback: Orifice clogging risk in dirty service; requires clean liquid feed. 2.3 Spray Nozzle Distributor Pressurized liquid is sprayed through nozzles to cover the packing surface. Common in small columns and scrubbers. Best for: Small towers (< 0.8 m), gas scrubbing, high fouling potential. Accuracy: ★★★☆☆ (70-85% uniformity). Drawback: Creates fine droplets that increase entrainment and pressure drop; poor coverage at low flow rates. Type Tower Diameter Liquid Load Uniformity Anti-Fouling Pan (Trough) 1.5 - 13 m High ★★★★★ Excellent Pipe Arm 0.5 - 3 m Medium ★★★★☆ Moderate Spray Nozzle 0.1 - 0.8 m Low-Medium ★★★☆☆ Good Figure 3: Dye tracer test—uniform distribution (left) vs. severe channeling from a poorly designed distributor (right). 3. 5-Step Selection Method Step 1 — Tower Diameter: < 0.8 m → Spray. 0.5-3 m → Pipe Arm. > 1.5 m → Pan. Step 2 — Liquid Load Range: Calculate min and max L/G. Pan handles the widest turndown (10:1). Spray nozzles need narrow bands (2:1). Step 3 — Operating Pressure: Vacuum service? Avoid spray nozzles (entrainment kills vacuum). Use pipe arm or pan. Step 4 — Fouling Potential: Solids present? Pan with large V-notches or spray nozzles. Avoid small orifices on pipe arms. Step 5 — Packing Sensitivity: High-efficiency structured packing (500Y, 700Y) demands ≥95% uniformity. Random packing tolerates 80-85%. 4. Why High-Efficiency Packing Demands Higher Accuracy The better your packing, the more sensitive it is to distribution quality. A 250Y packing with 20% maldistribution might lose 15% of its efficiency. A 500Y packing under the same maldistribution can lose 40% or more. This is why we always recommend pairing 500Y structured packing with a high-accuracy pan distributor. For a full overview, see our 5-factor packing selection guide. 5. Common Failure Modes & Material Selection Failure Mode Cause Prevention Clogging Solids, coke, or salt (NaCl, CaCO3) deposition Oversize orifices; specify self-draining design; install strainers Tilt / Out-of-Level Improper installation or support ring shift Use spirit level during install; weld support ring with certified flatness Flashing Pressure drop across feed pipe causes partial vaporization Increase feed pipe diameter; reduce inlet velocity below 1.5 m/s Weeping Operating below minimum liquid load Specify wider turndown; use V-notch instead of drilled holes Material Selection for Corrosive Services The same corrosion rules that apply to packing apply to distributors—with one extra challenge: stagnant liquid pools. Trough bottoms and dead zones can concentrate corrosives, accelerating attack. For a full material comparison, see our guide on 304 vs 316L structured packing. Clean organics: SS304L is sufficient. Amine / H2S / CO2 service: SS316L with proper drainage to prevent amine degradation hotspots. Chloride > 500 ppm: Duplex 1.4462 or Titanium Grade 2. Strong acids: Hastelloy C276 or Alloy 20. Figure 4: Installing a pan distributor through a manway—proper leveling is critical. 6. Pairing with Perforated Plate Packing When you choose perforated plate structured packing for its self-redistribution capability, you get a built-in safety margin. The perforations allow liquid to migrate laterally between channels, partially compensating for minor distributor non-uniformity. This makes perforated plate the forgiving choice for revamps where the existing distributor cannot be replaced. Quick FAQ Q: How often should a liquid distributor be inspected? A: Every turnaround. Even a 10% loss in distribution uniformity can reduce column efficiency by 20-30%. Visual inspection through a borescope or manway takes minutes and prevents months of subpar operation. Q: Can I reuse an old distributor with new packing? A: Only if it was originally designed for the packing type you're installing. A distributor built for 250Y will underperform with 500Y because the drip-point density is too low. Always verify drip-point count per m². Q: What is the ideal drip-point density? A: For structured packing, aim for one drip point per 50-100 cm² of tower cross-section. Random packing can tolerate one per 100-200 cm². Need a Complete Tower Internals Package? FXSINO supplies matched liquid distributors, support grids, bed limiters, and structured packing—all engineered together for your specific column. Send us your tower drawings or process data, and we'll deliver a complete internals solution. Contact FXSINO: jackieqiu9202@gmail.com | +86 18507999558

    Read More
  • How to Choose Distillation Column Packing: 5 Factors
    August 20, 2026

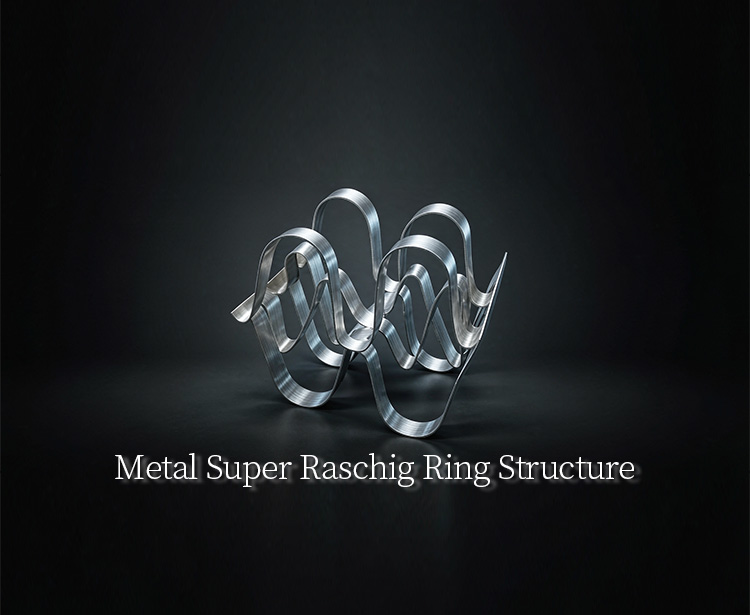
      { "@context": "https://schema.org", "@type": "Article", "headline": "How to Choose Distillation Column Packing: 5 Factors", "description": "Struggling to select the right distillation column packing? Learn the 5 critical factors—pressure, L/G ratio, corrosion, fouling, and capacity vs. efficiency—to make the right choice.", "author": {"@type": "Person", "name": "Jackie Qiu"}, "publisher": {"@type": "Organization", "name": "FXSINO"}, "mainEntityOfPage": { "@type": "WebPage", "@id": "https://www.fxsino.com/articles/how-to-choose-distillation-column-packing" } } Figure 1: Overview of common distillation column packing types—from random rings to high-efficiency structured sheets. How to Choose Distillation Column Packing: 5 Factors Quick Answer: The right distillation column packing depends on 5 factors: (1) Operating pressure, (2) Liquid-to-gas ratio, (3) Corrosion & material, (4) Fouling potential, and (5) Capacity vs. efficiency trade-off. Get these wrong, and you risk poor separation, premature failure, or costly rework. Selecting distillation column packing isn't a commodity purchase—it's a design decision that directly impacts your column's separation efficiency, energy consumption, and uptime. Whether you're revamping an old tower or designing a new one, this guide walks you through the 5 engineering factors that determine the right choice. Factor 1: Operating Pressure Pressure is the single most important constraint in packing selection because it dictates how much pressure drop your process can tolerate. Vacuum Service (< 0.1 bar): Pressure drop must be minimized. Wire gauze structured packing (e.g., 500Y, 700Y) or low-specific-area perforated plates (250Y) are ideal. The corrugation angle should be 45° (Y-type) to reduce gas resistance. Atmospheric Pressure (1 bar): Balanced efficiency and capacity. 250Y or 350Y perforated plate packing covers most applications. High Pressure (> 5 bar): Capacity dominates. Choose 60° corrugation (X-type) with lower specific area (125X or 250X) to maximize throughput. Random packing like metal Pall rings can also be cost-effective here. Factor 2: Liquid-to-Gas (L/G) Ratio The L/G ratio determines whether you need packing that excels at liquid distribution or gas-liquid interfacial area. Rule of Thumb: High L/G ratio (absorption, scrubbing) demands excellent liquid redistribution—perforated plate packing is the clear winner. Low L/G ratio (fractionation, stripping) requires maximum surface area—wire gauze or high-area structured packing (500Y, 700Y) is the answer. For a deep dive into how perforations solve liquid distribution problems, read our guide on Perforated Plate Structured Packing: Boost Wettability & Efficiency. Factor 3: Corrosion & Material Selection Your packing will fail prematurely if the material can't withstand the process chemistry. The most common mistake? Underestimating chlorides. Process Condition Recommended Material Why Clean organics, no chlorides SS304L Cost-effective, good general corrosion resistance H2S, CO2, amines with chlorides SS316L 2-3% Molybdenum resists pitting up to 1000-2000 ppm Cl- Hot concentrated chlorides Titanium Gr.2 / Gr.7 Superior resistance to pitting and crevice corrosion Strong sulfuric acid Alloy 20 / Hastelloy C276 Withstands aggressive acid at elevated temperatures Need help deciding between the two most common grades? Check our detailed comparison: 304 vs 316L Structured Packing: Which is Right for You? Factor 4: Fouling & Solids Content If your feed contains suspended solids, polymers, or tar, standard structured packing will blind quickly. The solution is perforated plate with a self-cleaning mechanism. Clean service: Any structured packing works. Wire gauze delivers the highest efficiency. Light fouling (trace solids, coking): Perforated plate with 4-5 mm holes. The holes force liquid exchange between channels, preventing stagnant zones where deposits form. Heavy fouling: Consider grid packing or random packing with large free volume. Plan for regular washing. Factor 5: Capacity vs. Efficiency Trade-off This is the classic engineering compromise. You can't maximize both at the same time. Priority Specific Area (m²/m³) Corrugation Example Model Maximum Efficiency 500 - 750 45° (Y-type) 500Y Structured Packing Balanced 250 - 350 45° or 60° 250Y Metal Structured Packing Maximum Capacity 125 - 250 60° (X-type) 125X / 250X Quick Selection Decision Matrix Use this matrix as a starting point. For detailed engineering, always consult with your packing supplier. Step 1: What is your operating pressure? → If vacuum, go to 250Y/500Y (Y-type). If high pressure, go to 125X/250X. Step 2: What is your L/G ratio? → High L/G: Perforated plate. Low L/G: Wire gauze or high-area structured. Step 3: What corrosives are present? → Match material (304L, 316L, Duplex, Ti). Step 4: Is fouling a concern? → Yes: Perforated plate. No: Any type. Step 5: Capacity or efficiency priority? → Choose specific area and corrugation angle accordingly. Frequently Asked Questions Q: Can I use random packing instead of structured packing? A: Yes, for less demanding separations. Random packing (e.g., metal Pall rings) costs less and handles fouling well, but delivers lower efficiency per meter of height. Structured packing is the choice when you need maximum theoretical stages in a limited tower height. Q: How long does structured packing last? A: In clean service with proper material selection, 10-15 years is typical. In corrosive or fouling service, expect 3-7 years before efficiency drops below acceptable limits. Q: What is the minimum liquid distribution requirement? A: For structured packing, a good rule is one liquid drip point per 50-100 cm² of tower cross-section. Poor distribution wastes the packing's efficiency potential regardless of the type you choose. Need a Custom Packing Recommendation? Send us your process parameters—pressure, temperature, L/G ratio, fluid composition, and tower diameter. Our engineers will specify the optimal packing type, material, and geometry for your column. Contact FXSINO: jackieqiu9202@gmail.com | +86 18507999558

    Read More
  • Perforated Plate Structured Packing: Boost Wettability & Efficiency
    August 20, 2026

      { "@context": "https://schema.org", "@type": "Article", "headline": "Perforated Plate Structured Packing: Boost Wettability & Efficiency", "description": "Learn how perforated plate structured packing improves wettability, redistributes liquid, and enhances mass transfer efficiency in distillation, absorption, and extraction columns.", "author": {"@type": "Person", "name": "Jackie Qiu"}, "publisher": {"@type": "Organization", "name": "FXSINO"}, "mainEntityOfPage": { "@type": "WebPage", "@id": "https://www.fxsino.com/articles/perforated-plate-structured-packing" } } Figure 1: Close-up of perforated plate structured packing showing corrugation and uniform perforation pattern. Perforated Plate Structured Packing: Boost Wettability & Efficiency Bottom line: Perforated plate structured packing uses precision-punched holes (typically 4-5 mm diameter) on corrugated metal sheets to force liquid film renewal, eliminate dry spots, and create turbulent recirculation zones—delivering up to 20-30% higher mass transfer rates than unperforated surfaces in the same column. When process engineers specify structured packing, the single most misunderstood feature is the perforation. Most buyers know they need "250Y" or "500Y," but few understand why the holes matter. This article breaks down the physics, the geometry, and the real-world payback of choosing perforated plate over unperforated or wire gauze alternatives. 1. What Is Perforated Plate Structured Packing? Perforated plate structured packing is manufactured from thin metal sheets (usually 0.1-0.2 mm thickness) that are first punched with a regular pattern of holes, then corrugated at a fixed angle (typically 45° or 60°). Adjacent sheets are nested with reversed corrugation directions to form open, inclined flow channels. Each hole typically measures 4-5 mm in diameter. The combination of perforations and corrugation creates three simultaneous effects: Forced liquid redistribution — liquid passes through holes to neighboring channels, eliminating wall flow and maldistribution. Continuous film renewal — the liquid film breaks and reforms at each perforation, destroying stagnant boundary layers. Enhanced surface roughness — micro-structures around each hole increase retention time and interfacial area. Common specifications include 125Y, 250Y, 350Y, 450Y, 500Y, and 700Y, with materials ranging from SS304L and SS316L to duplex stainless steels and titanium (Grade 2 / Grade 7). 2. How Perforation Improves Wettability Wettability is governed by contact angle: a low contact angle (≤90°) means the liquid spreads uniformly; a high angle (>90°) creates dry spots that kill mass transfer. On a smooth, unperforated metal plate, the liquid tends to channel along the corrugation valleys, leaving the peaks dry. The Perforation Effect: When liquid encounters a hole, capillary forces pull it through, creating a "liquid curtain" (also called "twin film") on the underside. This curtain dramatically increases the active interfacial area and triggers intense capillary waves on the free surface. Figure 2: Liquid curtain formation through perforations (right) vs. channeling on unperforated plate (left). Research from Air Liquide's R&D center using 2D-2C PTV optical flow visualization confirmed that perforated plates generate horseshoe vortices around each hole before curtain formation, followed by Dean vortices and kidney-pair recirculation after the curtain establishes. These chaotic eddies at higher Reynolds numbers produce: Strong turbulent vortices that accelerate species transport at the gas-liquid interface. Stagnation points with slow local film velocity, extending gas-liquid contact time. Negative film velocities detected locally within the curtain—evidence of true recirculation, not just downward flow. 3. The Efficiency Payoff: Numbers That Matter According to recent studies on structured packing surface modification, optimizing wettability can enhance mass transfer rates by 20-30% while simultaneously reducing energy consumption. The efficiency gain comes from three measurable improvements: Performance Metric Unperforated Plate Perforated Plate Liquid distribution uniformity Moderate (channeling) Excellent (homogeneous) Dry spot incidence High at low L/G ratio Minimal, even at spray density 0.2 m³/(m²·h) Mass transfer efficiency gain Baseline +20-30% Fouling resistance Low Strong (self-cleaning effect) Perforated plate packing operates reliably at spray densities from 0.2 to 200 m³/(m²·h) and pressures from vacuum to high pressure, making it the true "all-purpose" structured packing for chemical, petrochemical, oil refining, and natural gas processing. 4. Geometry Selection: Matching Hole Size & Corrugation Angle to Your Process 4.1 Perforation Diameter & Open Area Ratio Standard practice uses 4-5 mm diameter holes. The open area ratio (total hole area ÷ plate area) must be balanced: Too low (<5%): Restricts lateral flow, increases pressure drop, reduces film renewal frequency. Optimal zone: Enough open area to permit frequent liquid exchange between channels without sacrificing specific surface area. Too high (>15%): Reduces effective mass transfer area; the packing begins to resemble a grid tray rather than structured packing. 4.2 Corrugation Angle: 45° vs 60° The corrugation angle directly controls the trade-off between efficiency and capacity: 45° (Y-type): Higher efficiency, lower capacity. Ideal for vacuum distillation where pressure drop is the limiting factor. (e.g., 250Y, 500Y) 60° (X-type): Higher capacity, slightly lower efficiency. Preferred for atmospheric or pressurized absorption columns with high gas loads. (e.g., 250X, 500X) 5. Perforated Plate vs. Wire Gauze: When to Choose Which Both are "structured," but they serve different masters: Dimension Perforated Plate Wire Gauze Best for High L/G absorption, dirty services Ultra-low pressure drop, high-purity distillation Typical specific area 125-700 m²/m³ Up to 750 m²/m³ Cost Moderate Higher (complex weaving) Anti-fouling Strong Weak Rule of thumb: if your process involves H2S, CO2, or amine solutions with a high liquid load, perforated plate is your workhorse. For heat-sensitive vacuum distillation of fine chemicals where every Pascal of pressure drop counts, wire gauze wins. Need help choosing? Read our guide to 500Y for high-efficiency distillation. 6. Typical Applications Perforated plate structured packing dominates the following services: Natural gas drying & sweetening — strong anti-fouling, handles variable liquid loads. Crude oil atmospheric/vacuum distillation — low pressure drop, high capacity. Solvent recovery & air separation — uniform distribution prevents channeling. Pharmaceutical rectification — easy cleanability, meets ASME & API standards. CO2 capture with amines — perforations prevent localized overheating and degradation. 7. Material Selection for Corrosive Services The perforation itself is only as good as the metal around it. In chloride-containing environments, the edges of each hole become stress concentration points for pitting corrosion. This is why material selection is critical: SS304L: Suitable for clean organics without chlorides. SS316L: Contains 2-3% Molybdenum, resists pitting in chloride environments up to 1000-2000 ppm. See our 304 vs 316L comparison. Duplex 1.4462: For extreme chloride + mechanical stress combinations. Titanium Gr.2 / Gr.7: For hot, concentrated chlorides where even 316L fails. 8. Quick FAQ Q: Does perforation increase pressure drop? A: Minimal. The open structure of perforated plate packing is specifically designed to minimize gas flow resistance, resulting in low-pressure drop and improved energy efficiency. Q: Can perforated plate packing handle solids or foulants? A: Yes. The strong anti-fouling properties and low liquid holdup allow the packing to withstand systems with slight particulate contamination, making it ideal for natural gas processing and absorption. Q: What is the minimum tower diameter for perforated plate packing? A: Applicable from 80 mm up to 13 m tower diameter. For diameters >1.5 m, the packing is supplied in block form for modular installation. Specify the Right Perforated Plate Packing for Your Column Send us your process data—fluid composition, L/G ratio, pressure, temperature, and tower diameter. Our engineers will recommend the optimal specific area (125Y to 700Y), material grade, and corrugation angle. Contact FXSINO: jackieqiu9202@gmail.com | +86 18507999558

    Read More
  • 304 vs 316L Structured Packing: Which is Right for You?
    August 13, 2026

      { "@context": "https://schema.org", "@type": "Article", "headline": "304 vs 316L Structured Packing: Which is Right for You?", "description": "Compare 304 vs 316L stainless steel structured packing. Learn about PREN values, chloride limits, and cost analysis to choose the right material for your column.", "author": {"@type": "Person", "name": "Jackie Qiu"}, "publisher": {"@type": "Organization", "name": "FXSINO"} } Figure 1: Visual comparison of 304 (Left) and 316L (Right) structured packing surfaces. 304 vs 316L Structured Packing: Which is Right for You? Material Selection Alert: Choosing between 304 and 316L for your Metal Structured Packing isn't just about the budget—it's about preventing catastrophic failure. While 304 (SS304) is the cost-effective workhorse, 316L (SS316L) offers critical Molybdenum-based protection against chlorides. Let's break down the facts. 1. Chemical Composition & The "Molybdenum Advantage" The core difference lies in the alloying elements. Both are Austenitic Stainless Steels, but 316L contains 2-3% Molybdenum (Mo), which 304 lacks. Element 304 (SS304) 316L (SS316L) Impact Chromium (Cr) 18 - 20% 16 - 18% Forms passive layer (corrosion resistance). Nickel (Ni) 8 - 10.5% 10 - 14% Stabilizes Austenite structure. Molybdenum (Mo) 0% 2 - 3% Resists pitting & crevice corrosion. Carbon (C) ≤ 0.08% ≤ 0.03% "L" means Low Carbon (prevents weld decay). 2. Corrosion Resistance: The PREN Factor Engineers use the Pitting Resistance Equivalent Number (PREN) to quantify corrosion resistance. The formula is: PREN = %Cr + 3.3 × %Mo + 16 × %N Figure 2: Pitting corrosion on 304 (Left) vs. intact 316L (Right) after chloride exposure. 304 PREN ≈ 18-20: Susceptible to pitting in chloride environments. 316L PREN ≈ 24-26: Significantly more resistant to pitting. The Chloride Threshold 304 stainless steel typically fails when chloride (Cl-) concentrations exceed 50-100 ppm at elevated temperatures. 316L can often tolerate 1000-2000 ppm under similar conditions. If your process involves seawater, brine, or acidic chlorides, 316L is not just an option—it's mandatory. 3. Cost vs. Total Cost of Ownership (TCO) While 316L packing costs roughly 20-40% more upfront than 304, the TCO tells a different story: Scenario A (General Organics): If you are processing clean hydrocarbons or solvents with no chlorides, 304 is the economic winner. Using 316L here is over-engineering. Scenario B (Sour Water/Amine): If H2S and CO2 are present with trace chlorides, 304 will pit. Replacing packing every 2 years vs every 10 years makes 316L the cheaper option over a decade. 4. Selection Checklist: Which is Right for You? Choose 304 if... Choose 316L if... Critical Factor Process is non-corrosive. Chlorides (Cl-) are present. Chloride Concentration. Atmospheric temperature. High temperature (>60°C). Temperature Sensitivity. Budget is the primary constraint. Long-term reliability is key. Total Cost of Ownership. 5. Installation & Welding Note The "L" in 316L stands for "Low Carbon" (≤0.03%). This is crucial for Structured Packing because the thin metal sheets are often welded during module assembly or installation. Low carbon prevents sensitization (chromium carbide precipitation) at weld joints, which could otherwise lead to rapid intergranular corrosion. Always ensure your supplier provides material mill certificates (MTC) verifying the "L" grade. Quick FAQ Q: Can I use 304 packing in a coastal refinery? A: Generally, no. Atmospheric salt (NaCl) deposits and high humidity create a corrosive micro-environment. 316L is the standard for coastal or offshore installations. Q: Is 316L always better than 304? A: No. In sulfuric acid environments at high concentrations and temperatures, neither 304 nor 316L performs well; you would need Alloy 20 or Hastelloy. In pure, hot caustic (NaOH) service, 304 often outperforms 316L. Need a Corrosion Assessment? Send us your process parameters (Temperature, Chlorides, pH). Our engineers will recommend the optimal alloy for your structured packing. Contact FXSINO: jackieqiu9202@gmail.com | +86 18507999558

    Read More
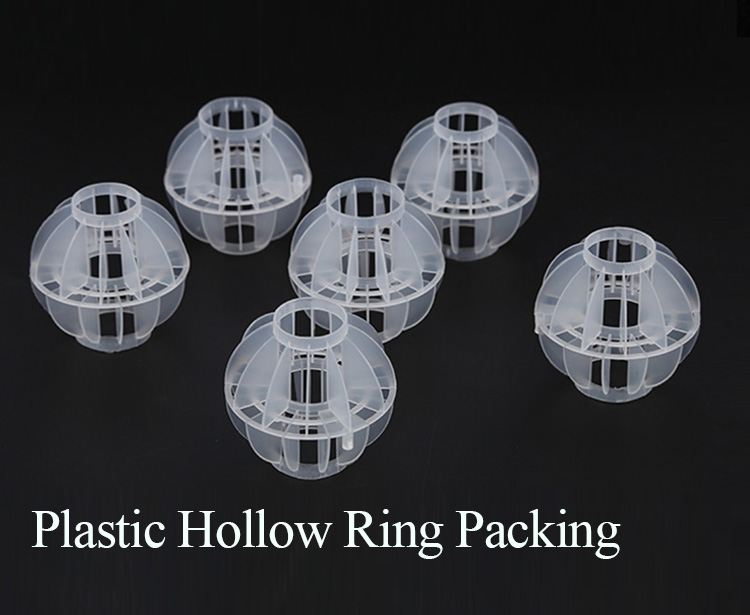
  • 500Y Structured Packing for High-Efficiency Distillation Columns
    August 13, 2026

      { "@context": "https://schema.org", "@type": "Product", "name": "500Y Metal Structured Packing", "description": "500Y Metal Structured Packing provides maximum separation efficiency with ~500 m²/m³ surface area. Ideal for high-purity distillation and fine chemical separation.", "brand": {"@type": "Brand", "name": "FXSINO"}, "sku": "FSP-500Y" } Figure 1: High-density corrugation of 500Y packing maximizes surface area for mass transfer. 500Y Structured Packing for High-Efficiency Distillation Columns Engineering Insight: When your distillation goal is maximum purity rather than maximum throughput, 500Y is the definitive choice. With approximately 500 m²/m³ of specific surface area, 500Y delivers the lowest HETP (Height Equivalent to a Theoretical Plate), enabling high-purity separations in a compact column height. ——Fxsino 1. Technical Specifications 500Y is designed for demanding separations. Below are the standard parameters based on FXSINO Datasheet Rev.2024-06: Parameter Value Operational Impact Specific Surface Area ~500 m²/m³ Doubles the transfer area compared to 250Y. Typical HETP 300 - 400 mm Achieves more theoretical plates per meter. Void Fraction ~95 - 97% Lower than 250Y; results in higher pressure drop. Packing Factor (Fp) ~55 - 65 (SI) Higher factor limits maximum vapor capacity. 2. Primary Applications & High-Efficiency Uses 500Y is the preferred solution when the separation task is difficult or the purity requirements are stringent: Fine Chemical & Pharmaceutical Distillation: Separation of isomers or heat-sensitive compounds requiring high purity. Solvent Recovery: Achieving high-purity recycled solvents (e.g., DMF, Toluene) in closed-loop systems. High-Purity Hydrocarbon Splitting: Separating close-boiling-point components where relative volatility is near 1.0. Top Sections of Tall Columns: Often used in the upper sections of very tall columns where vapor rates are lower but separation efficiency is critical. 3. Selection Guide: 500Y vs. 250Y Choosing between 500Y and 250Y depends entirely on your limiting factor. Use this table for quick reference: Choose 500Y if... Choose 250Y if... Key Differentiator Purity is the top priority. Throughput is the top priority. Efficiency vs. Capacity. Column height is limited. Column diameter is limited. Vertical space vs. Horizontal space. Relative volatility is low (<1.1). Relative volatility is high (>1.5). Separation difficulty. 4. Material Selection for Corrosive Services Due to the thin gauge of 500Y sheets, material selection is critical to prevent deformation under load and corrosion: 316L Stainless Steel: The standard for most chemical duties involving mild acids or chlorides. Hastelloy C-276: For highly aggressive services, such as acetic acid distillation or wet chlorine gas. Titanium: Essential for services involving wet chlorine, seawater, or strong oxidizing conditions. Note on 304SS: Not recommended for 500Y in critical services due to lower corrosion allowance and SCC risk. Critical Installation Warning The Distributor is Non-Negotiable 500Y has very little tolerance for liquid maldistribution. If the liquid distributor is not perfectly designed (target ±3% uniformity), the efficiency advantage of 500Y will be completely lost. Never pair high-efficiency packing with a low-quality distributor. Quick FAQ Q: Can 500Y be used in vacuum distillation? A: Generally, no. Due to its high packing factor and resulting high pressure drop, 500Y is not suitable for deep vacuum services. Use 250Y or specialized low-pressure-drop structured packing for vacuum columns. Q: Is 500Y worth the extra cost? A: Yes, if your product specification requires it. If you use 250Y for a difficult separation, you would need a much taller column to achieve the same purity, resulting in higher CAPEX and operating costs.   Request 500Y Hydraulic Performance Curves Ensure your column design is optimized. Contact FXSINO for detailed engineering data and a quotation. Contact FXSINO: jackieqiu9202@gmail.com | +86 18507999558

    Read More
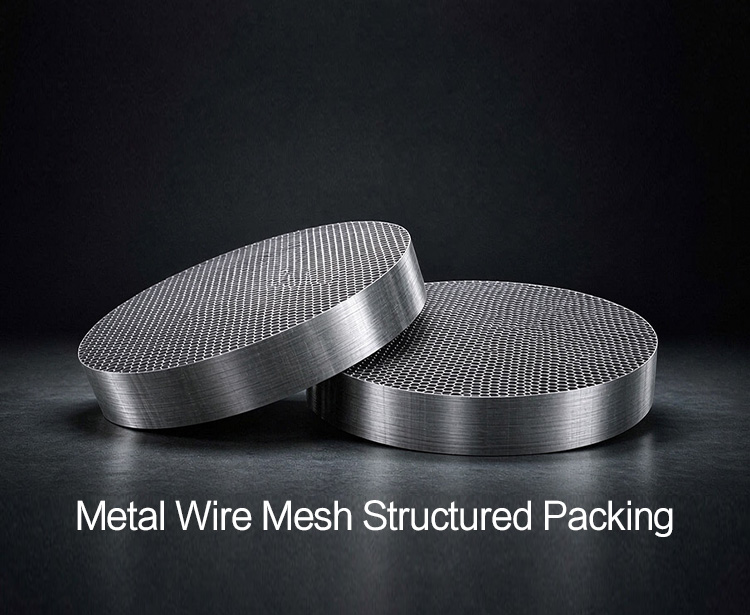
  • 250Y Metal Structured Packing: Specs, Uses & Selection Guide
    August 06, 2026

      { "@context": "https://schema.org", "@type": "Product", "name": "250Y Metal Structured Packing", "description": "250Y Metal Structured Packing offers 250 m²/m³ surface area, balancing efficiency and capacity. Ideal for atmospheric distillation and amine treaters.", "brand": {"@type": "Brand", "name": "FXSINO"}, "sku": "FSP-250Y", "material": "Stainless Steel 304/316L/410S" } Figure 1: Micro-structure of 250Y packing showing corrugation angles. 250Y Metal Structured Packing: Specs, Uses & Selection Guide Technical Overview: The 250Y model is the industry workhorse, offering approximately 250 m²/m³ of specific surface area. It strikes the optimal balance between separation efficiency (HETP) and vapor handling capacity, making it the default choice for general distillation and absorption duties. 1. Technical Specifications (Specs) Based on FXSINO's technical datasheet (Rev.2024-06), here are the standard parameters for 250Y: Parameter Value Significance Specific Surface Area ~250 m²/m³ Determines mass transfer efficiency. Void Fraction >98% Ensures low pressure drop. Corrugation Angle 45° (Y-Type) Balances capacity and efficiency. Packing Factor (Fp) ~28-33 (SI Units) Used for calculating flooding limits. Typical HETP 400 - 500 mm Height per theoretical plate. 2. Primary Applications & Uses Due to its balanced performance, 250Y is widely deployed in: Atmospheric & Medium Pressure Distillation: Crude oil atmospheric towers and vacuum towers (as top sections). Amine Treating (Gas Sweetening): Removal of H2S and CO2 from natural gas streams. Quench Towers: High-temperature gas quenching where 410S stainless steel is often required. Generic Absorption/Stripping: Any service requiring moderate efficiency and high capacity. 3. Material Selection Guide Selecting the correct alloy is critical for service life. Refer to this cheat sheet: 304 Stainless Steel: General organics, non-corrosive hydrocarbons. (Most economical) 316L Stainless Steel: Acidic environments, marine atmospheres, or services containing traces of chlorides. 410S Stainless Steel: High-temperature quenching (>400°C). Offers high strength but lower corrosion resistance. Monel/Inconel: Severe corrosive services involving high concentrations of H2S or chlorides. Common Installation Mistakes 1. Ignoring the Distributor 250Y is highly sensitive to liquid distribution. A poor distributor causes channeling. Always use a high-quality pan distributor with ±5% flow uniformity. 2. Leveling Errors Even a 1-degree tilt can cause vapor bypassing. Use a laser level during installation to ensure each layer is perfectly horizontal. Quick FAQ Q: When should I choose 250Y over 500Y? A: Choose 250Y when you need higher capacity and lower pressure drop. Choose 500Y only when you need maximum separation efficiency in a very limited bed height. Q: Can 250Y be cleaned in place (CIP)? A: Yes. Its open structure allows for effective high-pressure water jetting or chemical solvent circulation. Request 250Y Datasheet & Quotation Get precise hydraulic curves and a competitive quote for your project. Contact FXSINO: jackieqiu9202@gmail.com | +86 18507999558

    Read More
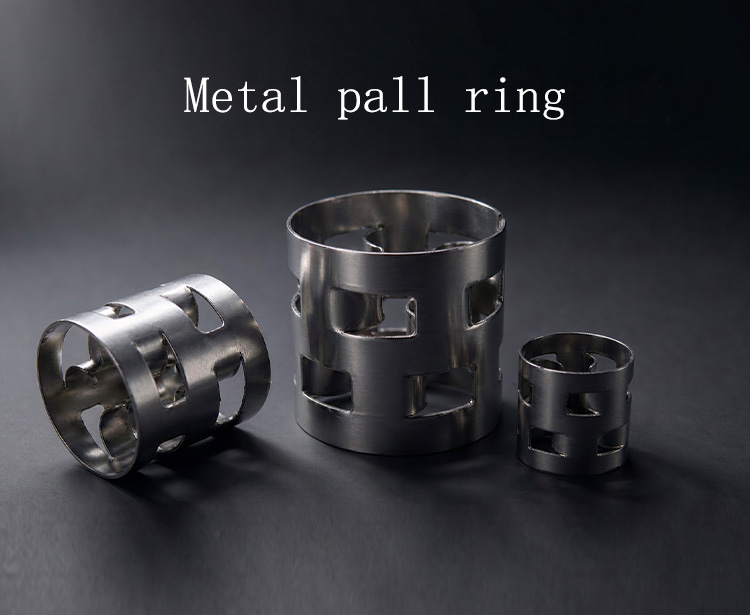
  • Metal Structured Packing: Types & Selection Guide
    August 05, 2026

      { "@context": "https://schema.org", "@type": "Article", "headline": "Metal Structured Packing: Types & Selection Guide", "description": "Compare 250Y vs 500Y Metal Structured Packing. Learn HETP, pressure drop, and material selection for distillation columns.", "author": {"@type": "Person", "name": "Jackie Qiu"}, "publisher": {"@type": "Organization", "name": "FXSINO"} } Figure 1: 250Y (Left) vs 500Y (Right) geometries. Metal Structured Packing: Types & Selection Guide Quick Guide: Based on FXSINO Datasheet Rev.2024-06. This guide covers the critical differences between 250Y and 500Y packing to help you optimize column efficiency and reduce energy costs. 1. 250Y vs. 500Y: Which Do You Need? The model number defines performance. Here’s the breakdown: 250Y (Balanced): ~250 m²/m³ surface area. Best for general distillation and absorption where you need a balance of efficiency and throughput. 500Y (High Purity): ~500 m²/m³ surface area. Used when maximum separation is required in a limited height (e.g., fine chemicals). Note: Higher efficiency means higher pressure drop. The "Y" Factor: Indicates a 45° corrugation angle, balancing capacity and efficiency. 2. Key Performance Metrics Focus on these three metrics when evaluating options: Metric Why It Matters HETP (Height Equivalent to a Theoretical Plate) Lower is better. Determines how tall your column needs to be. Pressure Drop (ΔP) Lower saves energy. Critical for vacuum distillation to reduce boiling points. F-Factor Measures vapor capacity. Helps prevent flooding. 3. Material Selection Cheat Sheet Choosing the wrong alloy leads to premature failure. Use this quick reference: 304SS: General organics, non-corrosive services. 316L SS: Acidic environments, marine atmospheres, or urea production. 410S SS: High-temperature quenching (>400°C) where strength is key. Monel/Titanium: Severe corrosion involving chlorides or H2S. 4. Avoid These 2 Common Mistakes Mistake 1: Poor Liquid Distribution Structured packing is useless without a good distributor. A cheap or worn-out distributor causes channeling. Always pair new packing with a high-quality pan distributor (±5% uniformity). Mistake 2: Incorrect Leveling Unlike random packing, structured packing must be level. A 1° tilt causes vapor bypassing. Use a laser level during installation to ensure perfect horizontality. Quick FAQ Q: Can I use 250Y in a vacuum column? A: Yes. Its low pressure drop makes it suitable, but ensure your F-factor calculations account for the low operating pressure. Q: Is structured packing better than random packing? A: For efficiency and low pressure drop, yes. For dirty services with solids, random packing (like HyPak) is often a safer choice due to its open structure. Get the Full Technical Datasheet Access complete hydraulic curves and material specs for 250Y & 500Y packing. Contact FXSINO: jackieqiu9202@gmail.com | +86 18507999558 About Jackie QiuSenior Process Engineer at FXSINO. 10+ years optimizing mass transfer for petrochemical plants. © 2026 Jiangxi FXSINO Mass Transfer Technology Co., Ltd.

    Read More
  • Metal Random Packing: The Versatile Workhorse for Mass Transfer
    July 22, 2026

      { "@context": "https://schema.org", "@type": "FAQPage", "mainEntity": [{ "@type": "Question", "name": "What is the difference between Metal Pall Rings and Metal Intalox Saddles?", "acceptedAnswer": { "@type": "Answer", "text": "Metal Pall Rings offer excellent mechanical strength and are easier to install due to their symmetrical shape. Metal Intalox Saddles provide slightly better liquid distribution and lower pressure drop due to their curved geometry, making them preferable in certain absorption and stripping services." } },{ "@type": "Question", "name": "Can Metal Random Packing be used in high-fouling services?", "acceptedAnswer": { "@type": "Answer", "text": "Yes. Open-structure packings like HyPak or Pall Rings are designed to resist fouling. Their large void fractions allow solids to pass through without bridging, and they can often be cleaned via backwashing, unlike structured packing which clogs easily." } }] } Figure 1: Common types of Metal Random Packing: Pall Ring, Intalox Saddle, and HyPak. Metal Random Packing: The Versatile Workhorse for Mass Transfer For decades, Metal Random Packing has been the backbone of countless distillation, absorption, and stripping columns. Unlike structured packing, these units are simply "dumped" into the column, creating a complex network of tortuous pathways. This simplicity translates to lower installation costs, excellent mechanical robustness, and tolerance for dirty feed stocks. It remains the preferred choice for atmospheric crude towers, quench systems, and general-purpose scrubbers.——FXSINO This guide compares the dominant types of metal random packing and outlines the critical factors for successful implementation.   Part 1: Comparing Metal Pall Rings, Saddles, and HyPak Selecting the right geometry depends on your specific balance of capacity, efficiency, and cost. Here is the technical breakdown: Performance & Property Comparison Feature Metal Pall Ring Metal Intalox Saddle HyPak (High Flow) Capacity High High Very High (+20%) Pressure Drop Low Low Ultra Low Mechanical Strength Excellent Good Good (Webs can bend) Best For General Distillation Absorption/Stripping Debottlenecking/Revamps Part 2: 3 Engineering Traps with Metal Random Packing Trap 1: The "Dump and Run" Installation Simply dumping packing from the top of a tall tower causes lighter packing to accumulate near the walls and heavier pieces to fall to the center, creating severe maldistribution. Always use a fabric chute to control the descent and keep the discharge point moving around the column cross-section to ensure a level bed. Trap 2: Ignoring Support Plate Open Area Random packing has a high void fraction (typically 93-98%). If the support plate underneath has too little open area (<60%), it becomes the limiting factor for capacity and causes premature flooding. Ensure your support grid matches the hydraulic capacity of the packing. Trap 3: Material Selection in Cyclic Services In services involving thermal cycling (e.g., start-ups/shutdowns) with H2S or chlorides present, 304SS or 316L can suffer from Stress Corrosion Cracking (SCC). For sour gas services or amine treaters, specify 410S Stainless Steel or other SCC-resistant alloys to prevent catastrophic failure. Part 3: Metal Random Packing Selection Guide Size Selection: #25mm and #38mm are the industry standards for efficiency. #50mm and #90mm are reserved for high-capacity applications or services with suspended solids. Geometry Selection: Use Pall Rings for robustness and ease of installation. Use Intalox Saddles for improved wetting in absorption. Use HyPak when revamping a tower for maximum throughput. Wall Thickness: For corrosive services, thicker gauges (e.g., 0.5mm vs 0.3mm) extend service life. For high-temperature services (>400°C), thicker gauges prevent deformation under load. Redistribution: In towers taller than 6 meters, install liquid redistributors regardless of packing type to counteract wall flow and maintain efficiency. Source High-Quality Metal Random Packing ✅ High Mechanical Strength ✅ Low Installation Cost ✅ Proven Reliability FXSINO manufactures a full range of Metal Random Packing including Pall Rings, Intalox Saddles, and HyPak. Contact us for bulk pricing and technical specifications. Contact FXSINO: [[jackieqiu9202@gmail.com]] | [[18507999558]] © 2026 Jiangxi FXSINO Mass Transfer Technology Co., Ltd. All Rights Reserved.

    Read More
1 2 3 4 5
A total of5pages

leave a message

leave a message
If you are interested in our products and want to know more details,please leave a message here,we will reply you as soon as we can.
submit

Home

Products

whatsApp

contact